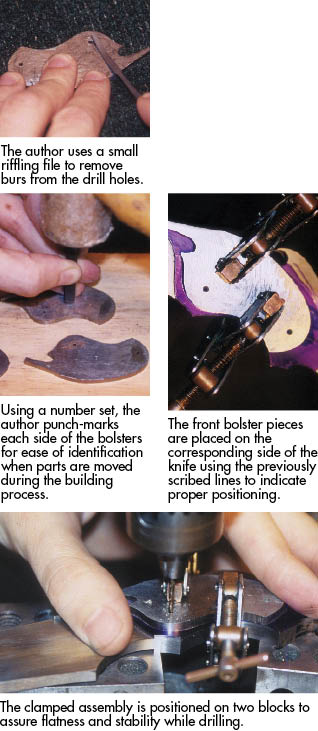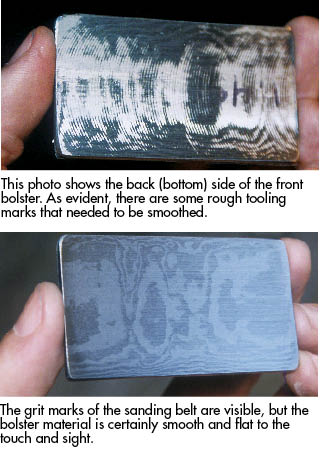
The next step is to permanently mate the front-top and bottom bolsters to the handle core using screws. It is essential that the surfaces where the bolsters meet the frame are clean and flat. Double check for burs from the tapping process, and gently sand both sides of the assembled knife core until they are flat. Repeat the process for both sides of the bolster liners and the bottom side of the Timascus bolster.
Assemble one bolster, the bottom in this case, onto the frame using two clamps. Use two #50 drill bits in the holes to align the parts. It’s handy to have extra drill bits on hand in this case, so keep you’re worn-out drill bits. Use the shank of the drill bit, not the fluted end. The non-fluted end will fit nice and tight into a tapped hole. You may even have to gently push the drill bit into the hole with a few taps of a rawhide or plastic mallet.
“Tapping” cuts threads into the wall of the hole, creating ridges that are wider than the initial drilled hole. The ridges of the threaded hole that face inside are still the same diameter as the initial pre-tapped hole. Get the alignment drill bits all the way through all components, and then clamp everything together. Now you know everything is square.
You have to remove the drill bits, which might take some help from a pair of pliers. Remember that in drilling, the bit will go into the hole easily because the bit is spinning. Flutes allow for air, pressure and debris to escape. This is not the case with the shank being hand forced into the hole; that is why it seems so much tighter.
Now that the holes are all re-aligned, run the tap through the already tapped components one more time to blend the threads. Blending the threads will help the screw smoothly transition from one layer to the next. Repeat the process for the second hole. Disassemble, de-Bur and reassemble.
After re-tapping the holes, and with a clamp in place to hold the alignment, insert a few 2-56 screws. Now that the screws are in place, you won’t be quite as reliant on the clamps for assistance as you were previously, and you will be adding more screws.
 NEXT STEP: Download Your Free KNIFE GUIDE Issue of BLADE Magazine
BLADE’s annual Knife Guide Issue features the newest knives and sharpeners, plus knife and axe reviews, knife sheaths, kit knives and a Knife Industry Directory.Get your FREE digital PDF instant download of the annual Knife Guide. No, really! We will email it to you right now when you subscribe to the BLADE email newsletter.


