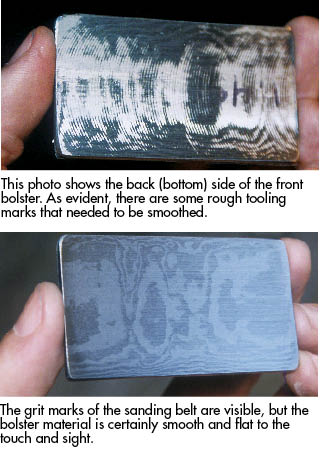
In the accompanying photo, taken from the rear side of the stack, you can see the area that has been left rough and overhanging on the top side of the bolster. Further on in the bolster-making process, it will be necessary to blend the outside profile of the knife with the areas that overhang.
Use a sharp-tipped scribe to trace the profiles of the finished bolster areas onto the handle where they will eventually be secured. You now have two placement marks showing where the bolsters will permanently reside on the handle. Until securing the bolsters to the frame, the registration marks consistently show you where the bolsters are supposed to touch the handle each time they are moved in the building process, whether intentionally or unintentionally.
Remove the drawing and tape from the top of the stack, and remove the stack from the clamp (it would be in the way now). Paint a layer of Dykem on the top surface. Lay the bolster stack in the proper position on the frame of the knife by lining the stack up with the previously scribed profile marks.
 NEXT STEP: Download Your Free KNIFE GUIDE Issue of BLADE Magazine
BLADE’s annual Knife Guide Issue features the newest knives and sharpeners, plus knife and axe reviews, knife sheaths, kit knives and a Knife Industry Directory.Get your FREE digital PDF instant download of the annual Knife Guide. No, really! We will email it to you right now when you subscribe to the BLADE email newsletter.


